What are the essential assembly and processing steps for the optimal opening and closing of TIP-ON BLUMOTION?
 Blum’s TIP-ON BLUMOTION motion technology combines two functions for drawers: easy, convenient opening and silent, effortless closing. This mechanical solution from Blum provides exceptional convenience, particularly for handle-less furniture in the kitchen and elsewhere in the home, for example bedrooms. With this blog article, we aim to show you how to achieve optimal function and what you need to be aware of during assembly.
Furniture construction
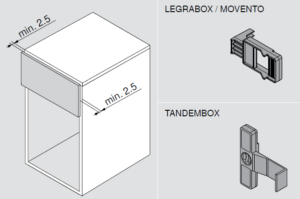
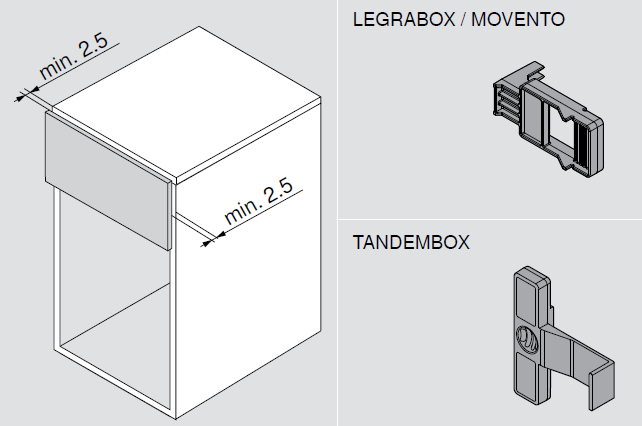
- Make sure you adopt a precise working method right from the start when manufacturing the cabinet and drawer. It is essential that you comply with the measurement and angle accuracy specified. This way, you can adjust the front gap to the required 2.5 mm and achieve optimal trigger behaviour.

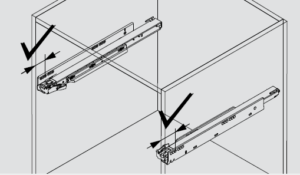
- Ensuring accuracy in the depth position of both cabinet profiles is also important during assembly.
- Avoid using bumpers in order to ensure optimal trigger behaviour.

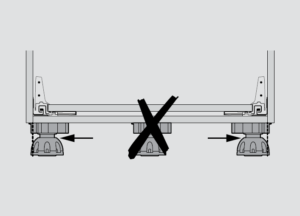
- The cabinet bottom may not bend upwards, therefore do not use a fifth plinth leg.


Manufacture and adjustment of fittings
- The front gap template for LEGRABOX and MOVENTO (65.5631) and TANDEMBOX (65.5627) enable you to achieve uniform front gap adjustment of 2.5 mm on both cabinet sides.
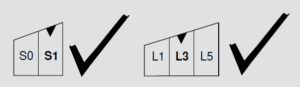
- The correct choice of TIP-ON BLUMOTION unit depends on the nominal length and total load and is the basic prerequisite for optimum functionality. You can identify the respective load configuration from the marked surface on the underside of the unit: for short nominal lengths of up to 300 mm, use S0 and S1; for longer nominal lengths from 350 mm, use L1, L3 and L5.
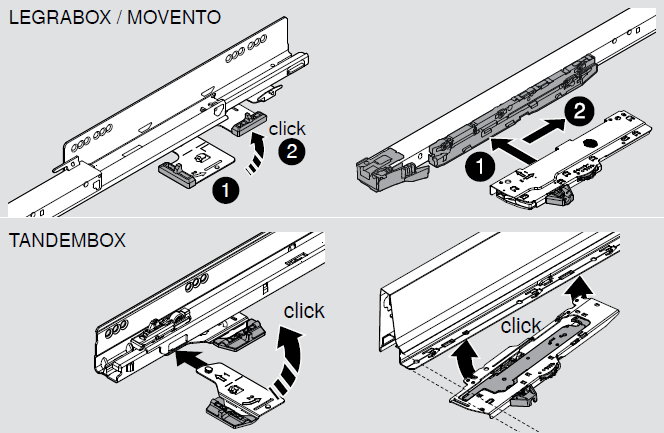
- When subsequently assembling the TIP-ON BLUMOTION unit, you should hear a loud click. This is how you can be sure that the components are fully engaged and firmly secured

- Use a synchronisation linkage to ensure the best possible trigger range. The trigger range can be optimised for comparatively large fronts – to do so, simply increase the front gap.
For further details click here.


Operation
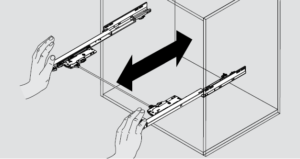
- In order to provide optimal protection for the synchronisation adapter, we recommend opening the cabinet profiles with attached synchronisation at the same time.
- It is also important that you use sufficient force when closing TIP-ON BLUMOTION as this ensures that the TIP-ON unit is properly pre-tensioned.


assembly and processing steps for TIP-ON BLUMOTION