SPACE STEP assembly tips
 Create functional furniture right up to the ceiling with SPACE STEP.
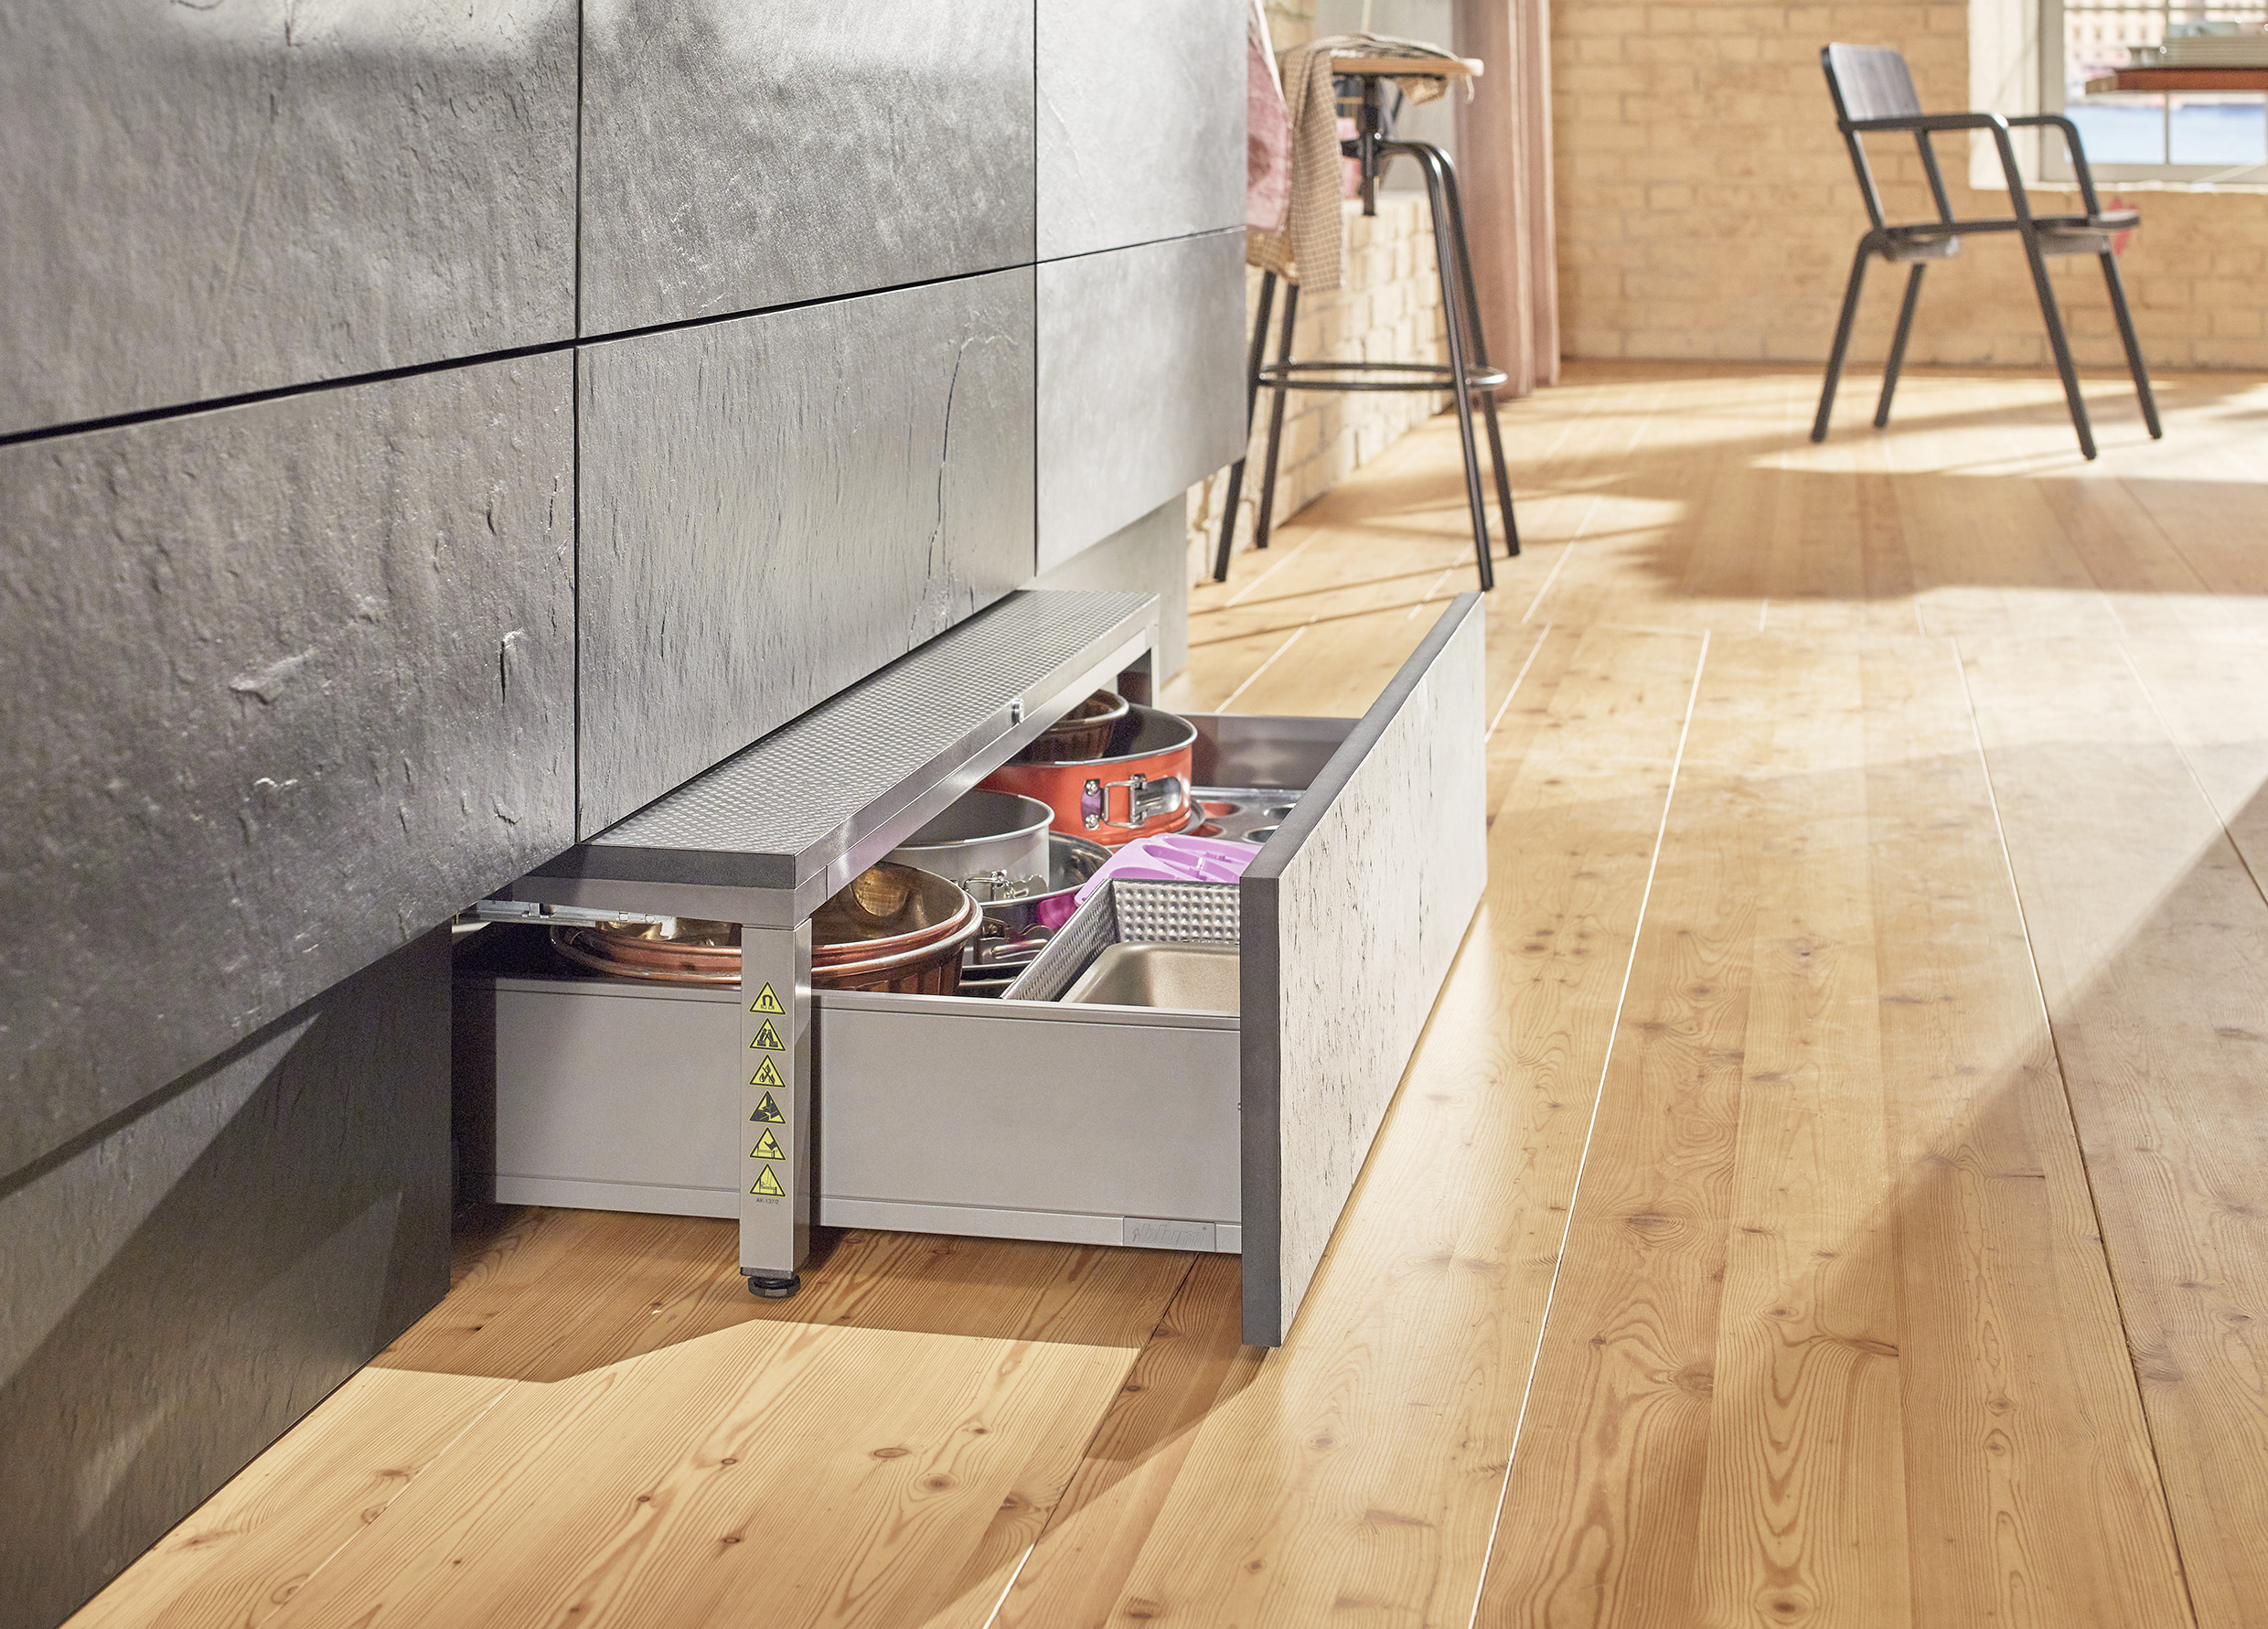
The plinth solution is perfect for furniture throughout the home. It creates additional storage space behind the toe kick of cabinets, allows small users to reach worktops and provides easy access to tall units and wall cabinets.
This blog gives you useful tips on how to assemble and adjust SPACE STEP.
Our video shows you how to assemble SPACE STEP step by step:
Use the screws with a flat underside included in the delivery to secure all nylon parts. Countersunk screws can damage the nylon parts.

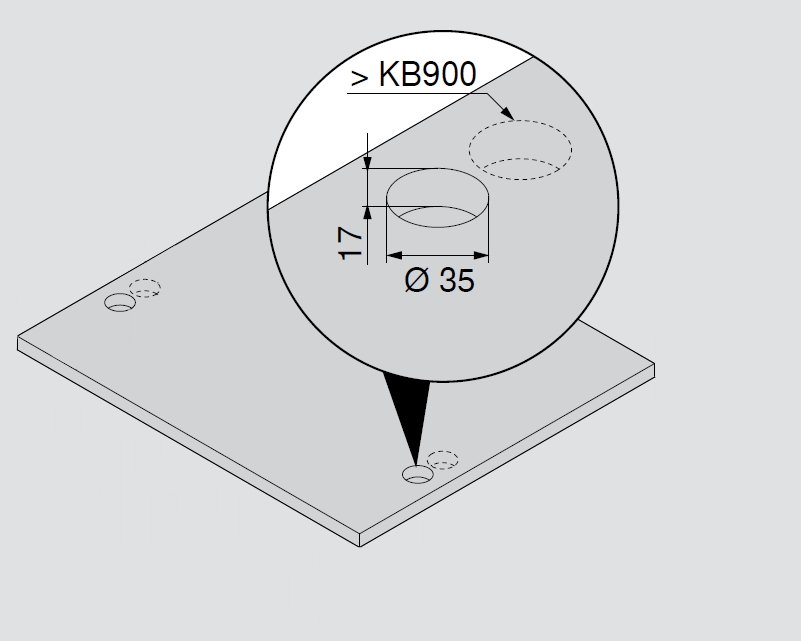
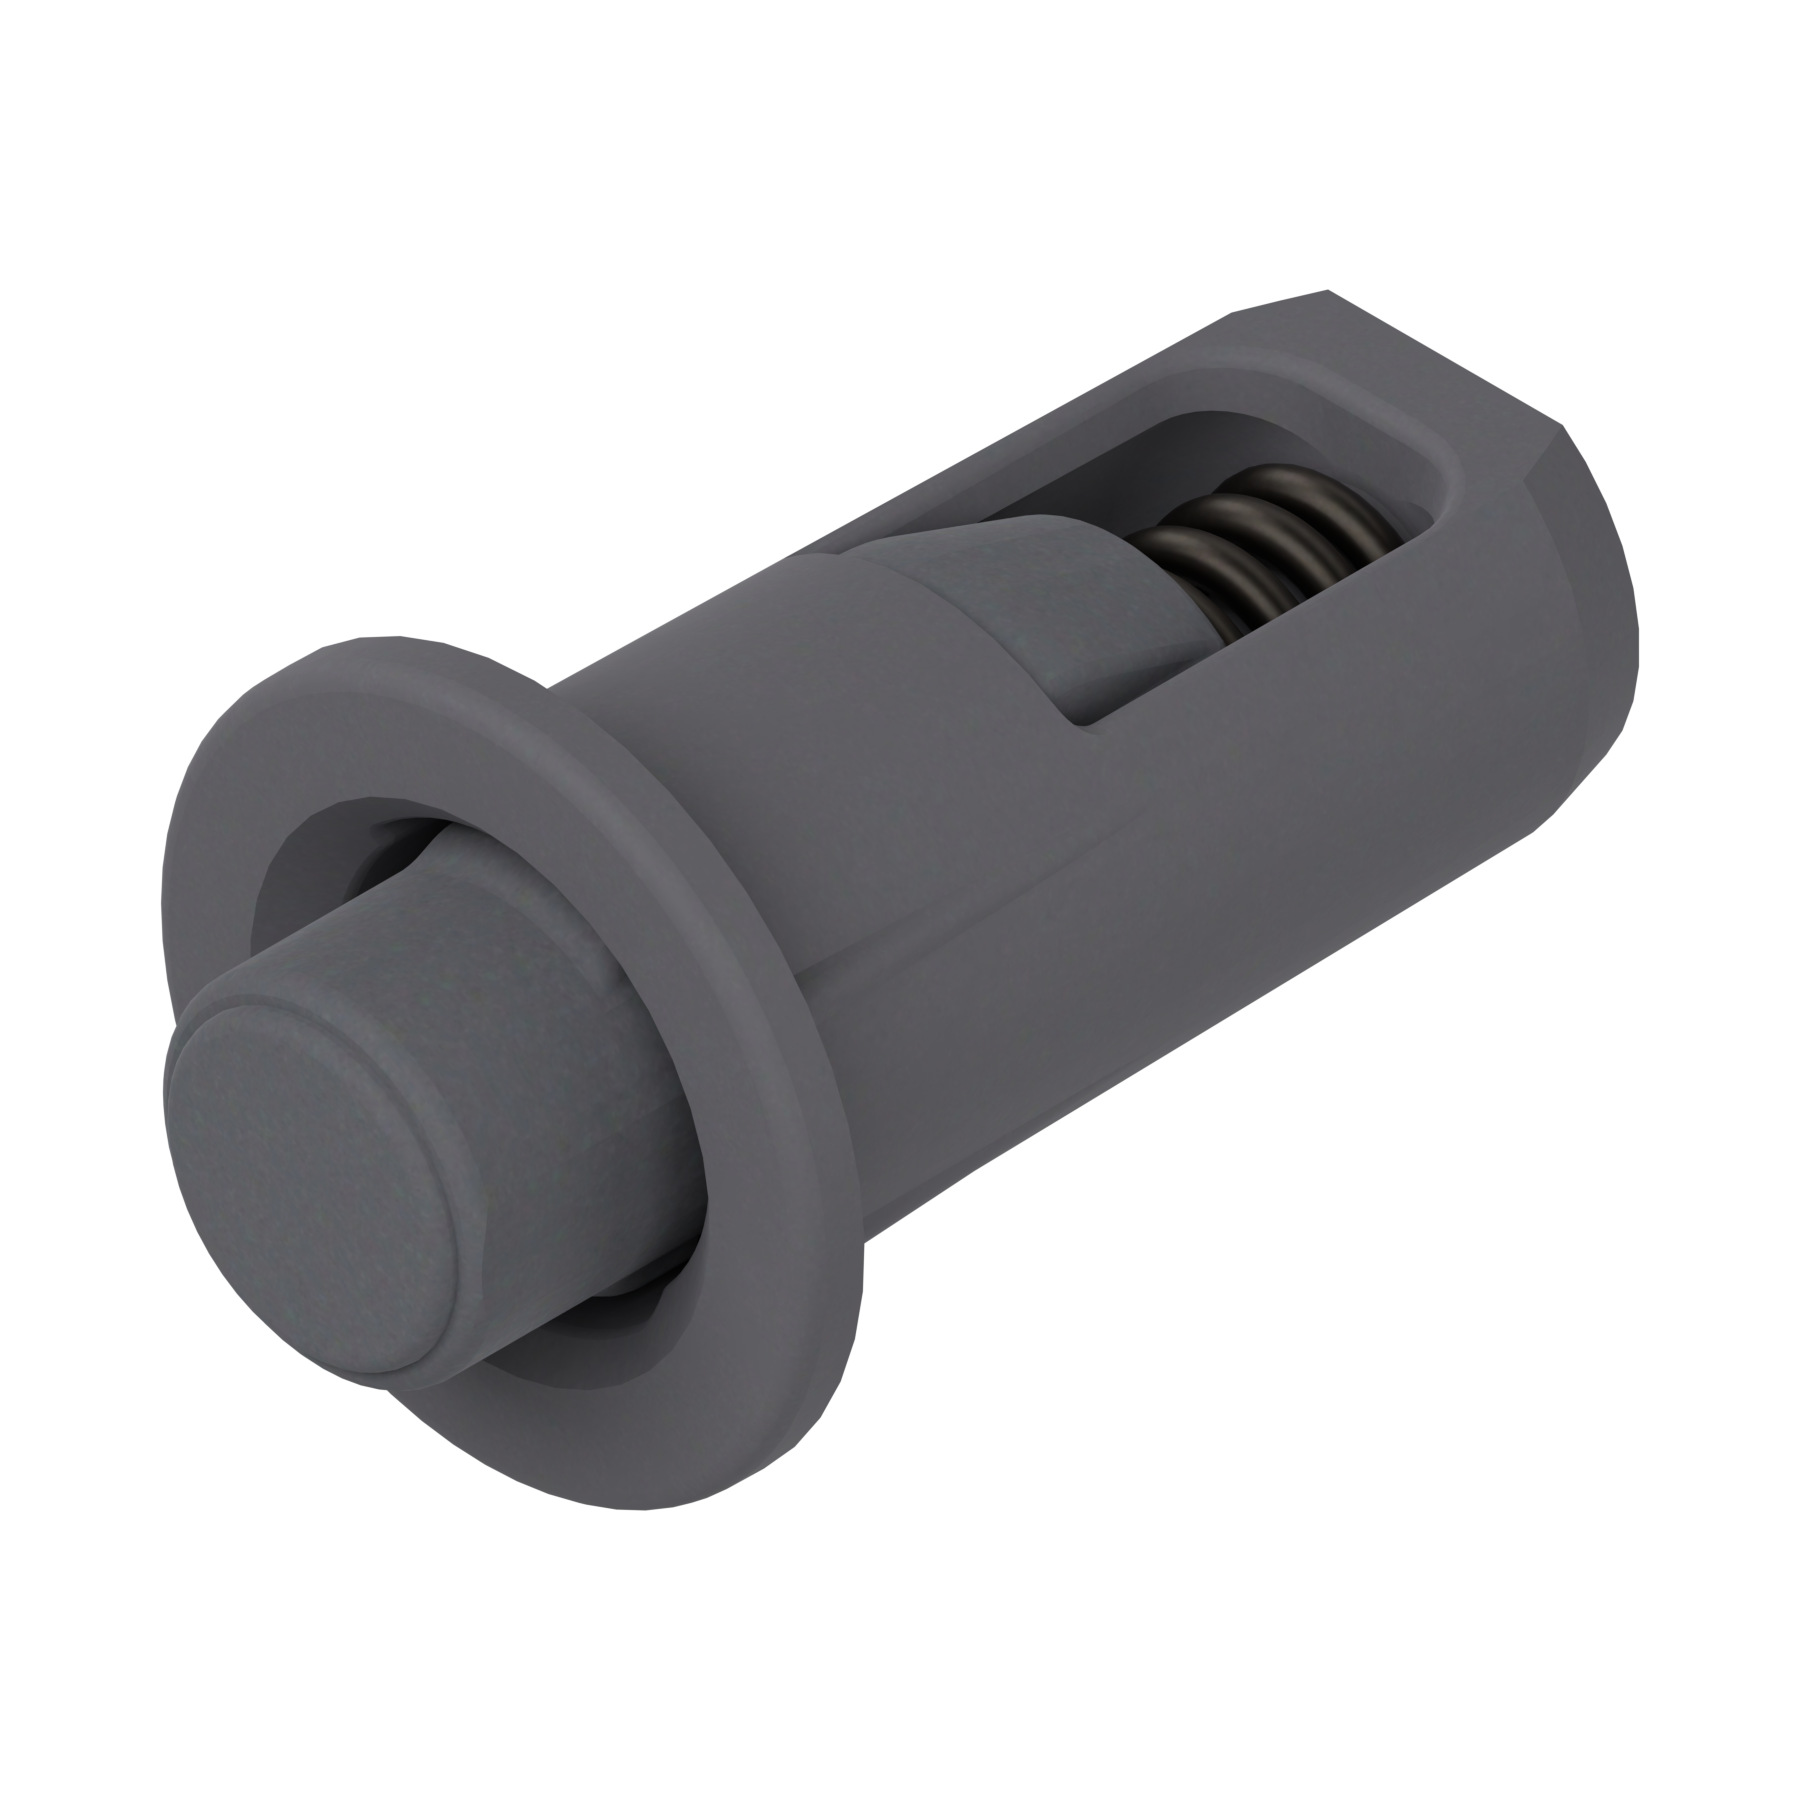
The set includes 4 spring bumpers. We recommend using 2 bumpers per side from a cabinet width of 900 mm so that SPACE STEP will not lower under its own weight.
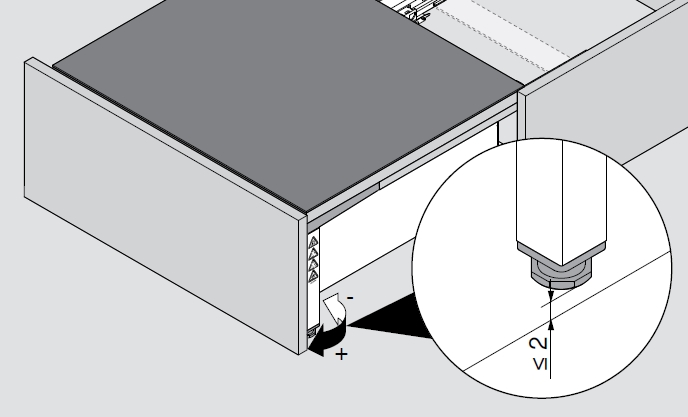
When extended, set the support feet of SPACE STEP so that they are not more than 2 mm above the floor. A hex key or pipe wrench is ideal for this task.
Please do not use rigid bumpers for SPACE STEP. Rigid bumpers could prevent contact between the magnet and catch plate when closing.
Alternatively, you can do without bumpers entirely or use sprung Blum distance bumpers.
More questions about the assembly and adjustment of SPACE STEP?
Leave a comment. We’re happy to answer any questions you have.
You can download a digital brochure and installation instructions of SPACE STEP here.